Monday, February 24, 2014

Black and White Gel Nails!!

This is my FIRST set of gel nails!!! I got all of my product today! 

How to get this look (minus instructions on how to apply tips and gel)

What you will need:


  • Nail Magic or any kind of base coat.
  • "Sinful Colors" brand in the color "Snow Me White."
  • "Pure Ice" brand in the color "Black Rage" or the .99 minis from Sally's (which is what I used for this look)
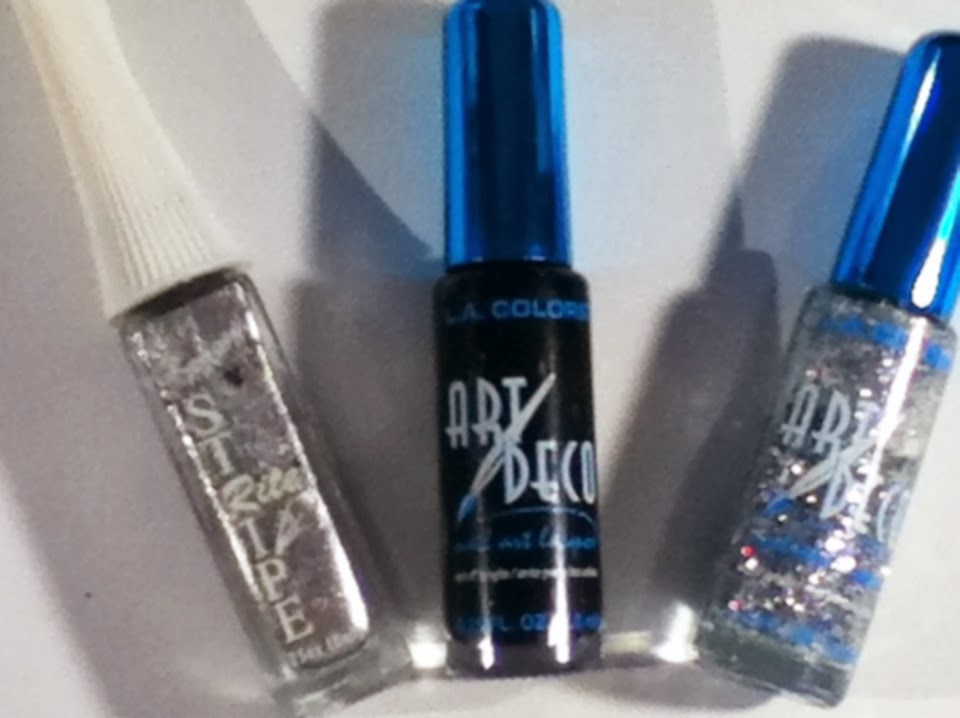
  • A silver striper. 
  • A nail art brush. I used a small one from Sally's Beauty.
  • "Out the Door" top coat.
First, apply the nails with a base coat to protect the nails from staining. 
Next alternate white and black, starting with the pinky nails. Apply two thin coats of each color! 
After all of these dry, apply the thin stripe of black to the white nails (as seen on the pinky and middle finger)
Next, take the nail art brush and apply the white stripes to the black nails (index and ring finger)
After these are dry, take the silver striper and use the silver color as a "separator" between the black and white colors. 
Then, just use the silver color underneath the black colors. 
*You can also add silver to the white stripes as well if you desire. Make it your own! There is no right or wrong way!*  
After all is dry, apply top coat and your finished! 

Thursday, February 13, 2014

Blue and Metallic Silver Manicure!

So, I am finished with the Valentine's Day looks for this month! I am just going to be posting looks that I think are awesome and "post worthy" and also, requests from you! Here is what you'll need to achieve this look:


  • "Nail Magic" base coat.
  • "Sally Hansen Xtreme Wear" in the color "Celeb City"
  • "Avon Mega Watt" in the color "Shock"
  • "Finger Paints" in the color "Copy Cat"
  • "Out The Door" top coat.
*You can use whatever colors you have on hand, I am just telling you what I use to get these looks* 
I don't recommend the Avon brand nail polish in any bright color like this because it took me 5 thin coats to achieve the desired blue color.

First, I applied the base coat.
Then, I applied the blue color (in 5 thin coats) on the index, middle and pinky fingers.
Next, I applied the metallic silver color (one coat is just fine) to the ring and thumb fingers.
After the metallic color dried, I took the chunky glitter and put 1 coat on top. (This glitter has a green background color to it. You can find chunky glitters that don't have this if you prefer) 
After everything dries, apply the top coat and your done! XOXO

Tuesday, February 11, 2014

Purple Heart and Glitter Look!

What you will need to accomplish this look:


  • "Nail Magic" base coat and strengthener.
  • "Sinful Colors" in the color "Snow Me White"
  • "Sally Hansen Xtreme Wear" in the color "Celeb City"
  • "Nina Ultra Pro" in the color "Royal Purple"
  • "Finger Paints" in the color "Copy Cat"
  • "Pure Ice" in the color "Cheatin"
  • Silver Striper.
  • "Out The Door" top coat.
  • Nail Art Brush #306
  • Nail Polish Remover
  • Q-Tips
Picture 1-

Apply two thin coats of the purple color to the index, pinky and thumb (I had to do 3 coats because the color is thin and kind of see through)
Next, apply two thin coats of the silver metallic color to the middle fingers.
Then, two thin coats of the white color on the ring finger.
After all of the nails are dry, apply the glitter (copy cat) on top of the metallic silver color on the middle fingernail.
Then, I took the purple glitter (Cheatin) and applied it to the purple nails. I applied the glitter to the free edge of the purple nails and just took the polish brush and pulled the glitter down towards my cuticle. (Makes it more subtle that way).


 Picture 2-

After the base colors are completely dry, take the silver striper and make horizontal stripes from left to right onto the white nails.
Next, dab the purple color onto a piece of paper and use the Nail Art brush to apply the heart. (See previous post on how to apply hearts to the nails). 
After this was dry, I dabbed the purple glitter onto the paper and used my nail art brush to apply the glitter to the heart. Once all of this is dry, apply top coat and your finished! 

Sunday, February 9, 2014

Pink, Black and Glitter Valentine's Look with Lips!

Continuing my Valentine's Day Looks! This one took patience but it was fun!! Once I get a camera, I will be attempting to do step by step video tutorials! How to get this look:


  • "Out The Door" top coat.
  • "Pure Ice" brand in the color "Love"
  • "Pure Ice" brand in the color "Spit Fire"
  • "Sinful Colors" brand in the color "Snow Me White"
  • A black striper of your choice in the color black.
  • A black polish of your choice. In this tutorial, I used the .99 cent polish from Sally's Beauty.
  • "Nail Magic" base coat and strengthener. 
  • "Polar Block" buffer. (seen in my products post)
  • "Winning Nails by Worldwide" Nail Art brush #306 (also seen in my products video)
  • Nail Polish Remover
  • Q-Tips
Remove older polish (if any) with polish remover. 
Then, take the Polar Block and buff all nails. I do this because it removes all surface stains and preps the nails for polish. 
Apply base coat.
Apply the light pink color to the index, ring and pinky fingers. (2 thin coats)
Next, apply the black color to the thumb and middle fingers. (2 thin coats as well)
Let all dry.
Next, put the black polish onto a paper plate. Take the nail art brush and simply draw on the "xoxo" onto the free edges of the index fingers.
Next, take the white polish and dab some onto the paper plate as well. Take the nail art brush and draw on the "Love" design to the middle fingers. Let dry.
Now, for the lips on the thumb fingers, all I did was flip the nail art brush around and used the end of it to dip into the white color, then applied it to the nail. (if you would like to see a tutorial on how to do this, just comment below)
Next, I applied the small hearts to the pinky nails. (I have a small tutorial on how to do this on my blog as well) then, I just filled in the empty spaces between the hearts with small dots.
Now, take the pink glitter and apply it to the ring finger for some extra bling! 
After all is completely dry (and make sure it is because I got a little anxious and smeared it all and had to do touch ups) apply top coat and your done! 


Friday, February 7, 2014

Blue and Silver Heart Acrylic Manicure!

It's been a while since I've done acrylic nails! Turned out pretty good! What you will need (minus the acrylic steps and procedure)


  • "Nail Magic" base coat.
  • "Sally Hansen Xtreme Wear" brand in the color "Celeb City"
  • "Sinful Colors" brand in the color "Snow Me White"
  • "Finger Paints" brand in the color "Copy Cat" (you can purchase at Sally's Beauty)
  •  "Stripe Rite" brand in the silver color. (also at Sally's)
  • "Pure Ice" brand in the color "Celestial"
  • "Out The Door" top coat.
  • A Nail Art brush or small painting brush.

This was a very easy design!
First, I applied the base coat on all of the nails. Second, I painted the index fingers and the pinky fingers with the blue color. Next, simply apply the silver color "Celeb City" to the thumb and middle fingers.
Then, apply the white color to the ring fingers. *Apply two thin coats to every finger*
After all of them dry, take the color "Copy Cat" (or the glitter of your choice) and apply it on top of the silver color. 

Now..moving on to the design! Take the silver colored striper and apply the stripes in a straight line from left to right. (or however you are comfortable) 
Then after these dry, apply the hearts on the bottom right corner. (see my previous step by step guide on how to draw on the hearts). After the design is dry, apply top coat and your done! 

Thursday, February 6, 2014

Red Valentine Heart Manicure!

As the Valentine Challenge month continues, I have yet another look to share! How to get this look:


  • "Nail Magic" base coat. (found at Sally's Beauty)
  • "Nina Ultra Pro" brand in the color "Ruby Fire." (found at Sally's Beauty)
  • "Sinful Colors" brand in the color Snow Me White."
  • "Sinful Colors" brand in the color "Queen of Beauty." 
  • "Out The Door" topcoat.
  • "Winning Nails by Worldwide" Nail Art Brush #306
  • Q-Tips.
  • Nail Polish Remover.
How I achieved this look:

First, coat all nails in the "Nail Magic" base coat.
Next, paint the free edge of your nail red. 
After the red color dries, apply the top of the red color with the "Queen of Beauty" glitter polish. (or any silver glitter you have)
Once all of this is dry, take the Nail Art brush (make sure it is small) and use it to apply the hearts. You can choose whichever nail you like and you can even use a toothpick as well if you do not have a brush. Place the white polish on a piece of paper, then dab the brush or toothpick into the polish and apply the dots! The dots are really easy to apply. Below, I'll show you with a marker step-by-step on how to paint on the hearts. XOXO


Simply copy these steps as shown to create the perfect heart! It may take some practice and as always, tweak the hearts until you get them how you want them. You may find that the heart is skinny on one side, and fat on the other..just play around with them until you get what you want. ENJOY! 

Tuesday, February 4, 2014

The Products I Use!

I had a request from someone to post the supplies that I use to complete my looks. That way, when I describe them in my tutorials, you know what I speak of. 

Picture 1- (Sorry about the messy buffers, I'm in need of a couple new ones)

  • (top) This is called a "Chammy Shine." This is used on the natural nail for buffing and shining. It works wonders!!! If your not a polish person, this is perfect for you! Sally's Beauty Supply.
  • (middle) This is called the "Polar Block" or "Buffing Block." This is used mainly on acrylic nails but you can gently use them on the natural nails if need be. If you do your polish in a bright color and you forget to apply your base coat, this is good for removing surface stains from the nails. Sally's Beauty Supply.
  • (bottom) This is the only Nail Art brush I own. I find this small brush very versatile for a lot of different designs! This is found at Sally's as well.
Picture 2
This is my nail stamping collection! This is for those smaller, more intricate designs that my left hand won't allow me to do. :-)
All the octagon shaped ones (on left and top) came in a kit from Amazon. You can type in "Nail Stamping Kits" and it'll bring up tons of looks to choose from! Be careful though because not ALL kits come with the rubber stamper and scraper. The second to the last plate came from Walmart. 
The last plate on the far right is actually a name brand plate from: www.konadnail.com
Here at this site, you can browse tons of different plates and nail supplies! I just bought the name brand Konad plate from Amazon. 


Picture 3-
These are all of my loose glitters! They are very versatile! You can use them on your eyes with special adhesive gel OR you can use them to glam up your nails! I have a couple of golds, a couple of whites, a silver and a bright green (which is not posted.) I will be demonstrating these glitters in a lot of future looks and I'd have to say...I'm very excited! 

Picture 4-
These are all three of my stripe polishes! I don't have many because most of the time, I use my nail art brush for making stripes on the nails. These can be found at any convenient store! I usually get mine from Sally's Beauty Supply or the Dollar Store. Now, keep in mind that you pay for what you get. The one's from the Dollar Store have a weird smell and get gummy VERY quickly so..I would recommend buying from Sally's or Walmart. 

Picture 5-
This is a shot of everything together. The circular things at the top are gems and pearls that are used for nail decorating! I couldn't post a picture of them by themselves because they were white against a white background and they kinda disappeared :-) 
I have tons of different colors and looks in those gem containers. I purchase those at the Dollar Store for a few dollar total! 

If you have any questions about any of this product, just comment below! XOXO

Black and Pink Leopard Heart Design!

There are a lot of supplies used for this look! Only because the I was missing some colors and I had to mix a couple of different colors to get the desired color. What you will need:


  • "Nail Magic" base coat (as always, my favorite!)
  • "Out the Door" Top Coat. 
  • "Avon Mega Watt" brand  in the color "Electric".
  • "Pure Ice" brand in the color "Love".
  • "Sinful Colors" brand in the color "Pinky Glitter."
  • "Pure Ice" brand in the color "Black Rage."
  • "Sinful Colors" brand in the color "Snow Me White."
  • Two stripers "Silver" and "black." 
  • Bobby Pin.
  • Toothpick.
  • #306 Nail Art Brush. (found at Sally's) 
How this was done:

First, apply all nails with the base coat (or any of your choice).
Then, lets prepare the background colors. My index fingers were applied with two thin coats of the white color. My middle and thumb fingers were applied with the black polish. (I only did one coat, feel free to do two thin coats for more staying power). The ring and pinky finger both were applied with two thin coats of the "Love" color. (light pink) 
Now, after all these dried, I applied the hearts on all of the black nails. I find it easier to apply the bigger hearts with the bobby pin. To do this, put the light pink color on a piece of paper, then dip the tip of the bobby pin in the polish. Next, place two dots at the top near the cuticle, then one dot underneath. I then used the nail art brush to connect and shape the hearts. Keep playing around with them until you get the desired look. Hold them up to face you to make sure the hearts are even all around.
Next, I worked on the chevron index fingers. I used a mix of the nail art brush and the black striper to complete this look. (whatever feels more comfortable to you). Start off at the cuticle and work your way down. Make the stripes small at first, then thicken them up as you go.
Moving on to the ring finger! Now, I used a toothpick to make these smaller "leopard" looking hearts. This look is done just like the larger hearts on the other fingers were done..just smaller! **I mixed the Avon brand color and the "Love" color together to create the color I wanted for the small hearts.** 
I made "C" shapes around the small hearts after they dried and added some silver in with it as well! 
The pinky finger was coated with one coat of the "Pinky Glitter" color. Then, after all is dry, apply the top coat and your done! 

Heartbeat Look in Red and White!

I recreated this look for my Sister In Law, Shaina Coe! 

What you'll need:


  • "Nail Magic" Base Coat.
  • "Ruby Ruby" in the "Sinful Colors" brand.
  • "Snow Me White" in the "Sinful Colors" brand.
  • Sally's #306 Nail Art Brush. 
  • "Out The Door" Top Coat.
First, paint all the nails with the base coat (or any base coat that you have)
Second, paint all the nails red. (I did one coat on all only because I will be doing multiple looks today and it'll be easier to take it all off again). If you want a little more staying power, do two thin coats. 
Next, I took the Nail Art brush and started on the thumb on the left hand and worked my way across. For the heart, it's easier to start on the left side with the small line first, then make two bumps along the top to create the top section of the heart, then just fill it in. 
Lastly, when all is dry, apply the top coat and your finished!

*Whenever I purchase my new camera, I will post step by step instructions!! I find it hard to do with horrible camera quality. Pictures will get better!!* 

Monday, February 3, 2014

I Love a Challenge!!

I had mentioned having a Valentine's Day Theme to my blog this month and I have all of MY looks picked out! The question I have is...do YOU have a challenge for me? If you want to send me a link or picture to me to see if I can copy it..I'll post it sometime this month!! Just email the image to:

krystle.coe05@gmail.com 


OR

Look me up on Facebook by Krystle Coe and inbox me a look! 

Sunday, February 2, 2014

Red Heart Valentine Nails!!

During the whole month of February I am going to be posting nothing but Valentine's Day Nail Looks to my blog!! I am really excited about this and am up for the challenge! 
What you will need to complete this look:


  • "Nail Magic" base coat.
  • "Queen of Beauty" in the "Sinful Colors" brand.
  • "Snow Me White" in the "Sinful Colors" brand.
  • "Out The Door" top coat. 
  • "Ruby Ruby" in the "Sinful Colors" brand.
  • bobby pin.
  • Small nail art brush.( I used the "Winning Nails By Worldwide" brand #306 Nail Art brush.)
  • Q-Tips.
  • Nail Polish Remover.
First, start off with the "Nail Magic" base coat. One thin coat will do.
Then, paint all the nails red except for the ring finger. (I only did one coat of red because red is a VERY hard color to get off and if you apply it the first time rather well, I wouldn't do a second coat)

Next, paint the two ring fingers in two THIN coats of white. The white color is very tricky so..the thinner the coats, the better they will look! 


Then, to apply the heart, take the red color and dab some of the color onto a piece of paper. After you do that, take the bobby pin and dip it into the red color. Make three dots with the bobby pin. Two dots for the top of the heart and one dot for the bottom of the heart.


Here is where the little nail art brush comes in handy. After you have applied the dots, take the nail art brush and connect the three dots to form the shape of the heart (you may have to hold your hand up to face you to make sure the hearts are even on both sides)


When it all COMPLETELY dry, take the glitter nail polish and put one thin coat of it on all of the red nails.  


*Somewhere in between all of the drying, you can take the q-tips and clean off the skin around the nails. This keeps you busy as your nails dry! By the time you get all of the polish off of the edge cleaned off, they should be dry.*


Now, after the heart dries, take your nail brush once again and dip it into the glitter and apply it to the heart. Once everything is dry, apply the top coat and your done!